%20on%20Raenest%20from%20Coinbase.jpg)

Sending Stablecoins (USDT & USDC) from Coinbase to Raenest


Getting paid across borders often comes with unnecessary decisions. Which bank will process it faster? How long will the funds sit in limbo? Whether the final amount will match what was sent. For many people earning in dollars from outside their home country, those questions show up with every payment.
Stablecoins remove most of that guesswork. They let you receive value in U.S. dollars without relying on traditional banking rails, while keeping transfers fast and predictable. If you already use Coinbase to hold or receive crypto, you can send USDT or USDC straight into your Raenest account and have it converted to USD automatically. This guide walks you through how to do exactly that.
Why you should receive stablecoins with Raenest
- Enjoy 4 free deposits every month
- You sidestep price swings common in many cryptocurrencies.
- Funds can land in your account in moments without traditional banking delays.
- The stablecoins are immediately converted into USD at a 1:1 rate.
How to send stablecoins (USDT & USDC) from Coinbase to Raenest
Sending stablecoins from Coinbase into your Raenest account is simple and secure. Follow these steps to ensure a smooth transfer:
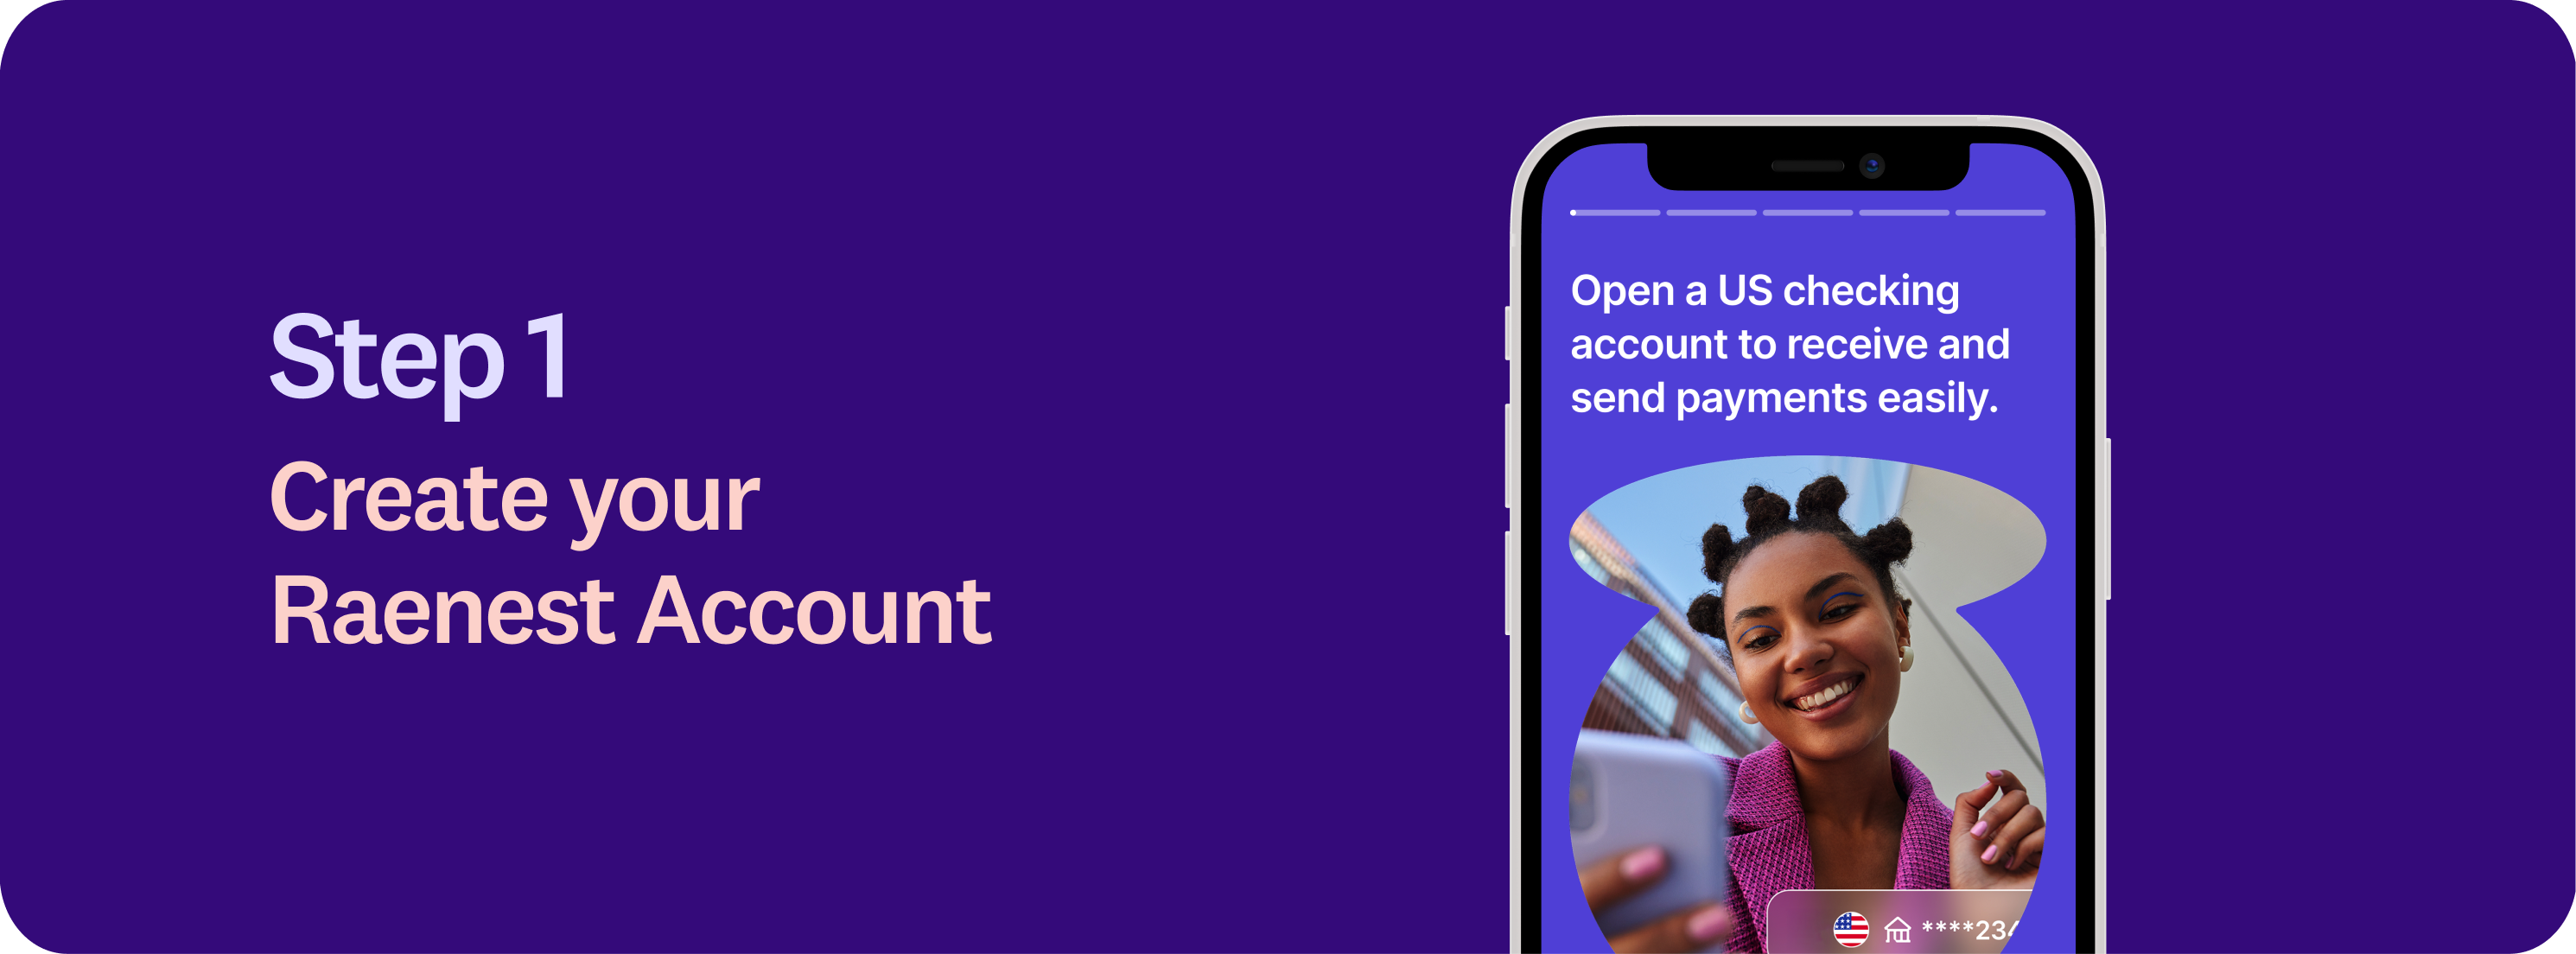
1. Create your Raenest account
Download the Raenest app or visit the Raenest website to get started.
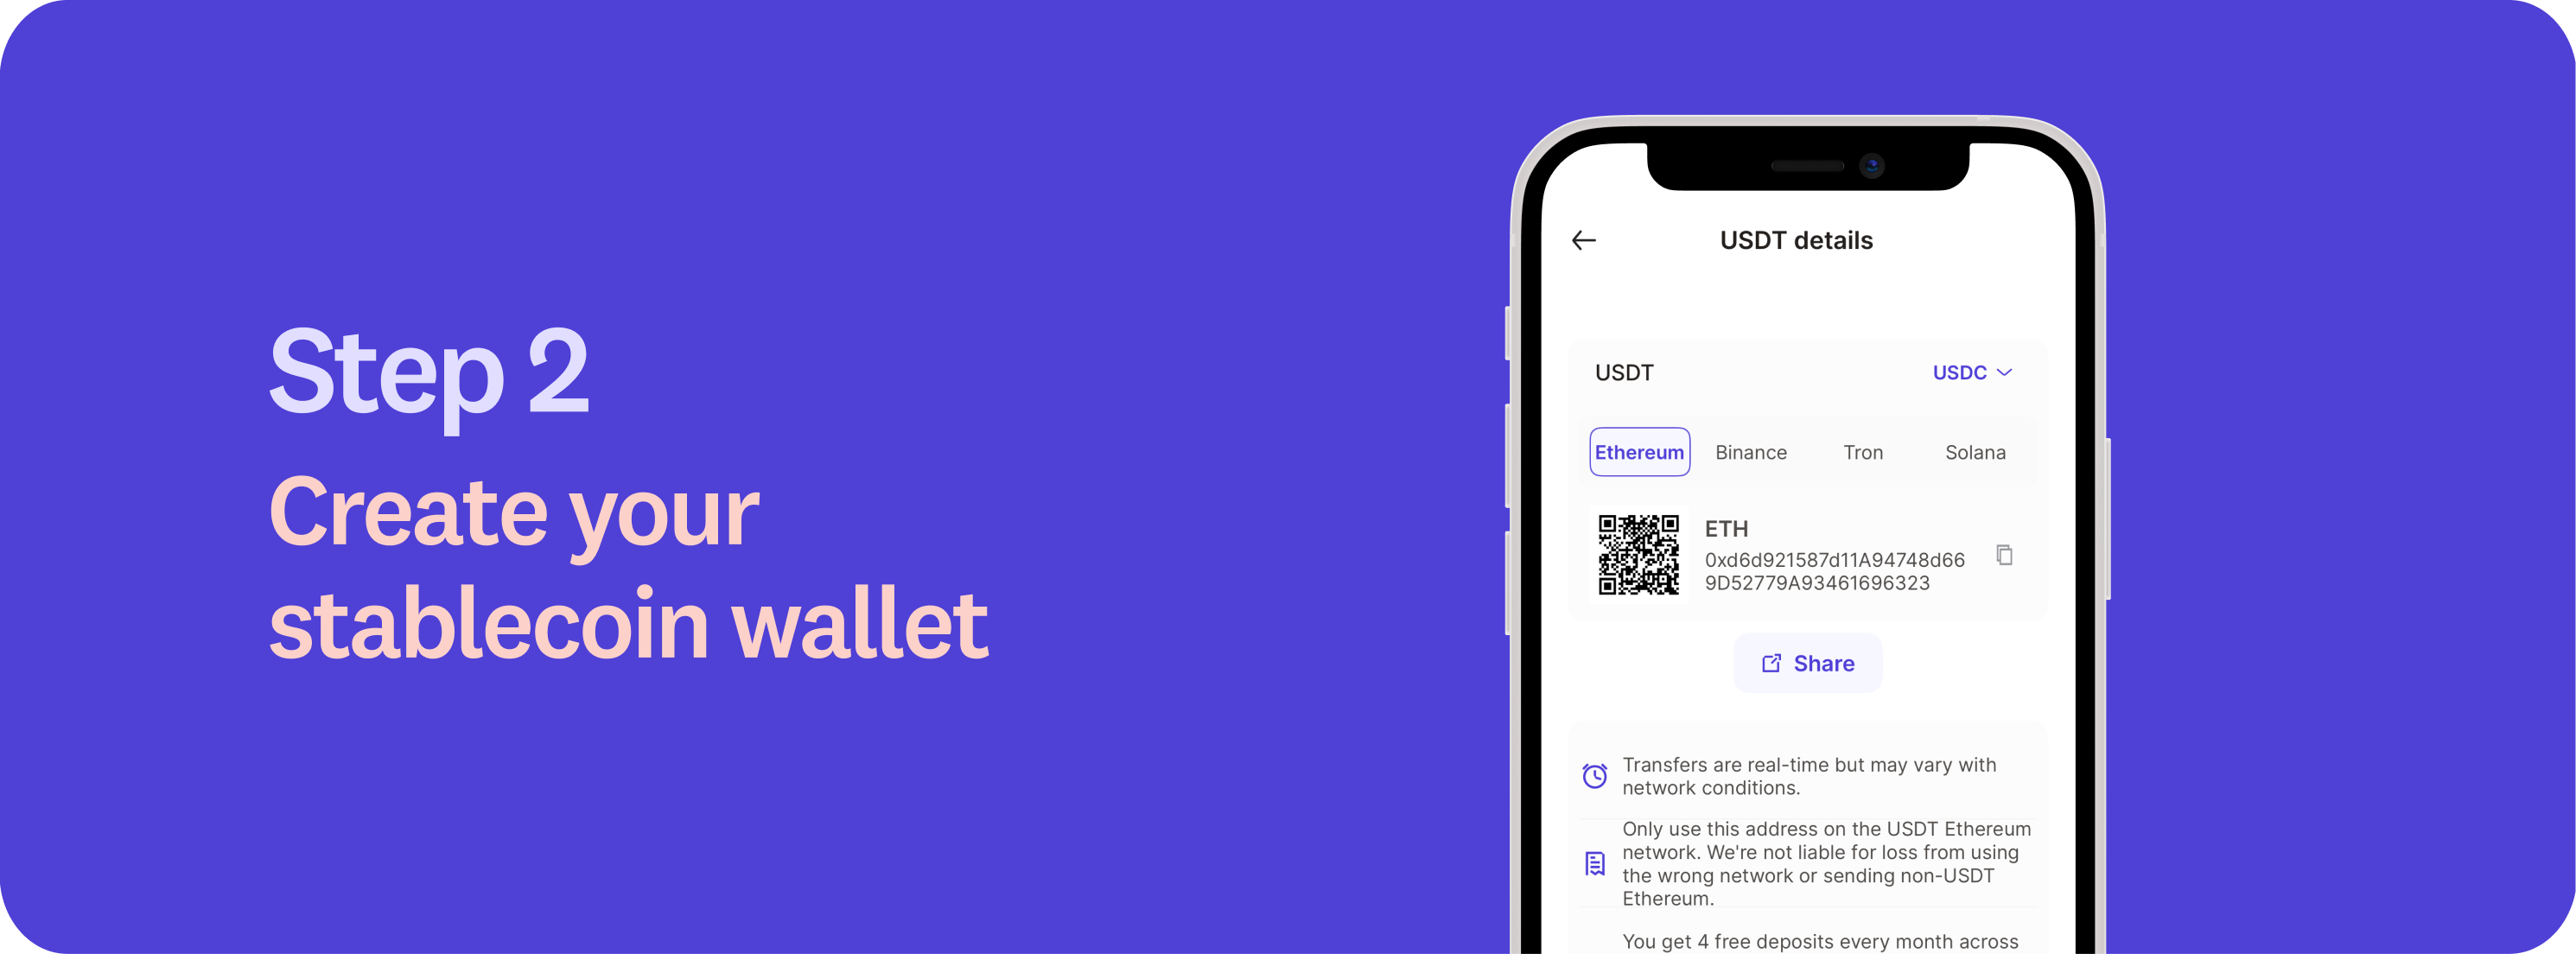
2. Create your stablecoin wallet
Log in to the Raenest app, navigate to the Accounts tab, and select your USD account. If you don’t already have a USD account, you may need to complete a short questionnaire to get started.
Within your USD account, select either USDC or USDT to generate a unique wallet address. This address is where your stablecoins will be sent. Copy this address carefully, it’s unique to your account.
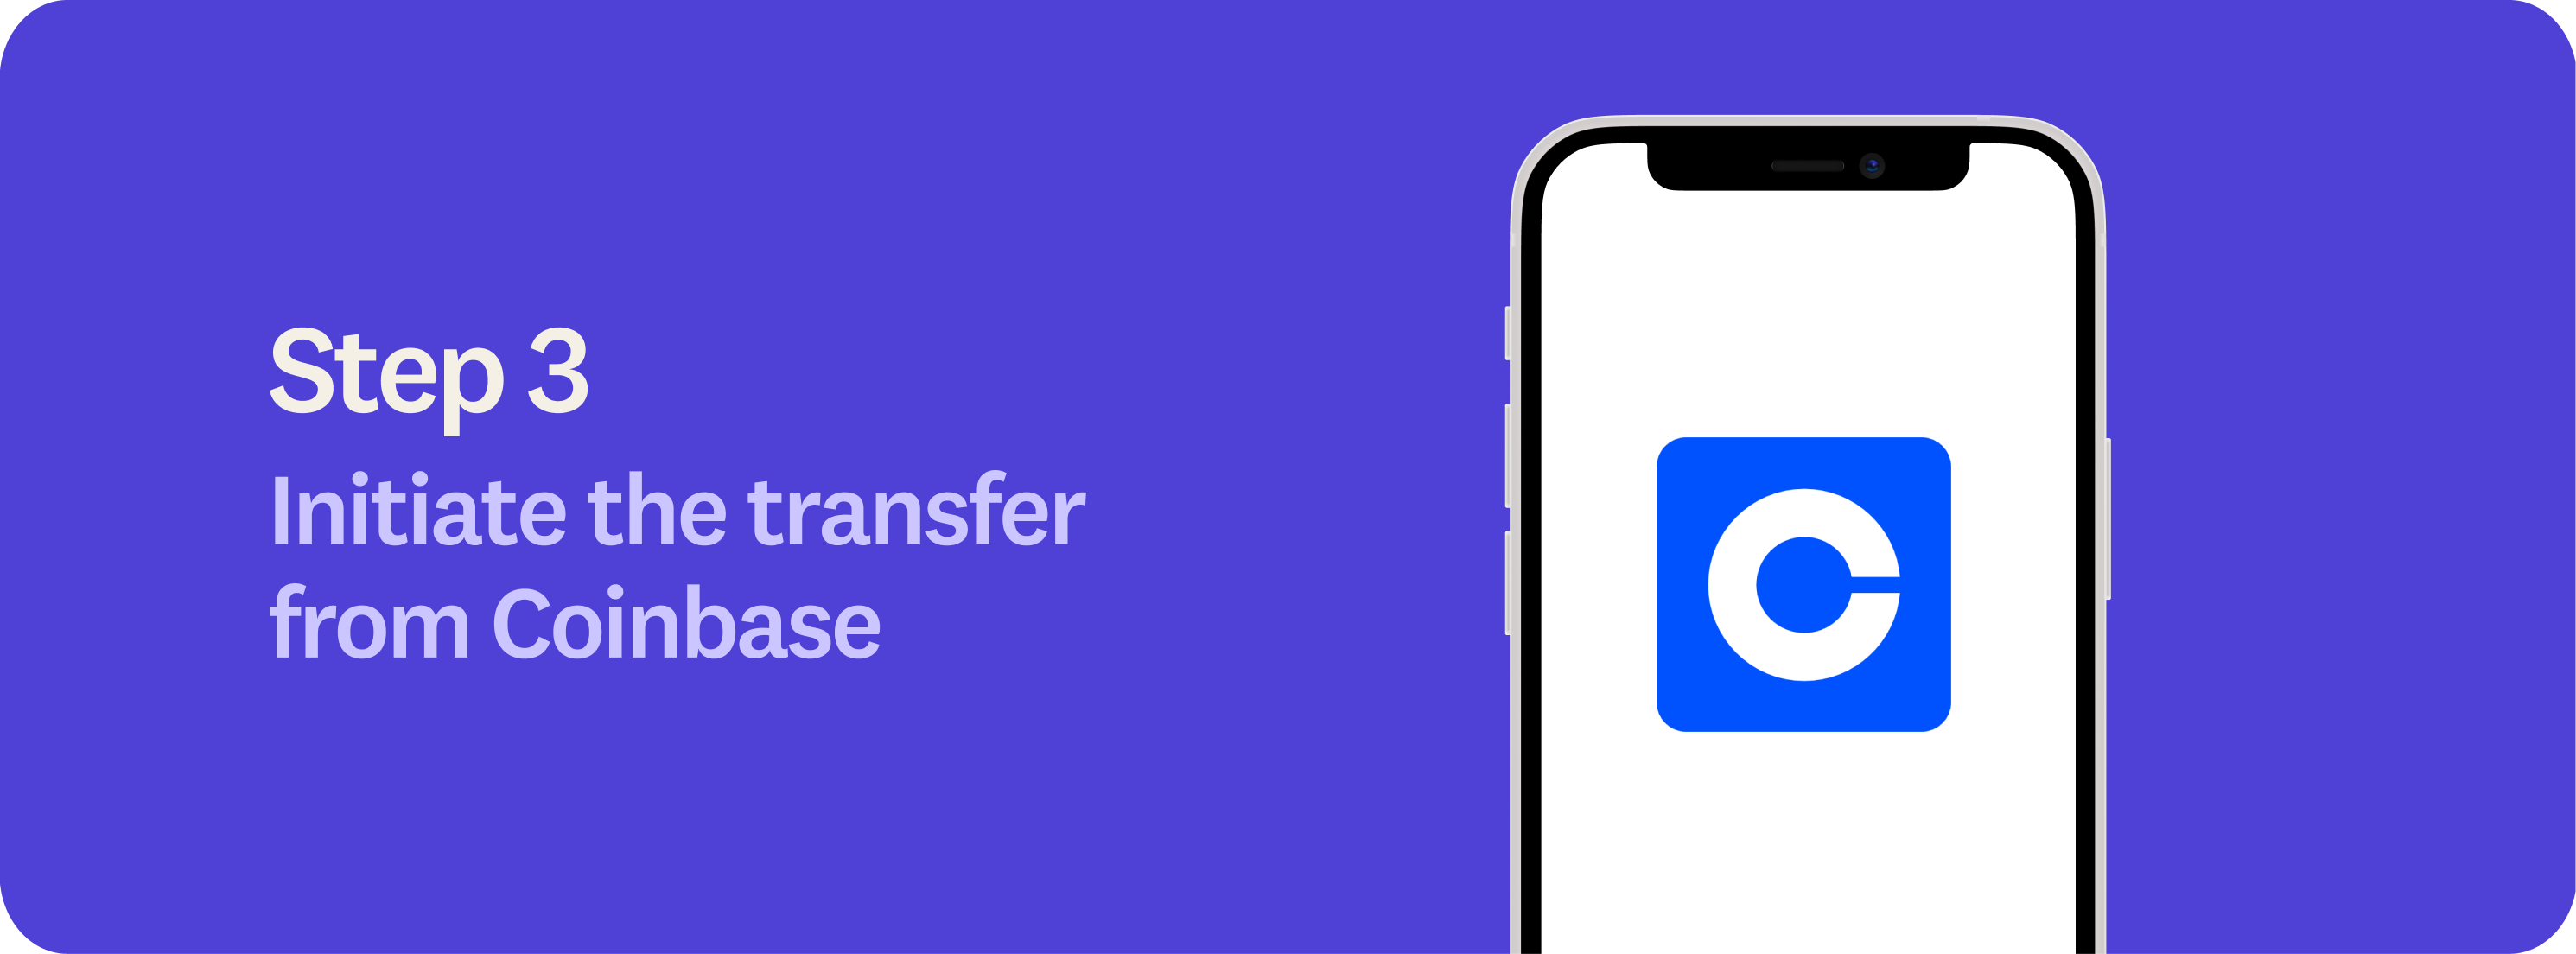
3. Initiate the transfer from Coinbase
Log in to your Coinbase account. From the dashboard, go to Assets and select the stablecoin you want to send, either USDT or USDC. Click Send. Coinbase uses “Send” for outbound crypto transfers to external wallets. When prompted, choose Send to a crypto address. Paste your Raenest wallet address into the recipient field. Coinbase may ask you to confirm that you’re sending to an external wallet and, optionally, save or label the address. If Coinbase prompts you to select a network, ensure it matches the network supported by the Raenest wallet address you generated. This step is essential. Sending on an unsupported network can result in lost funds.
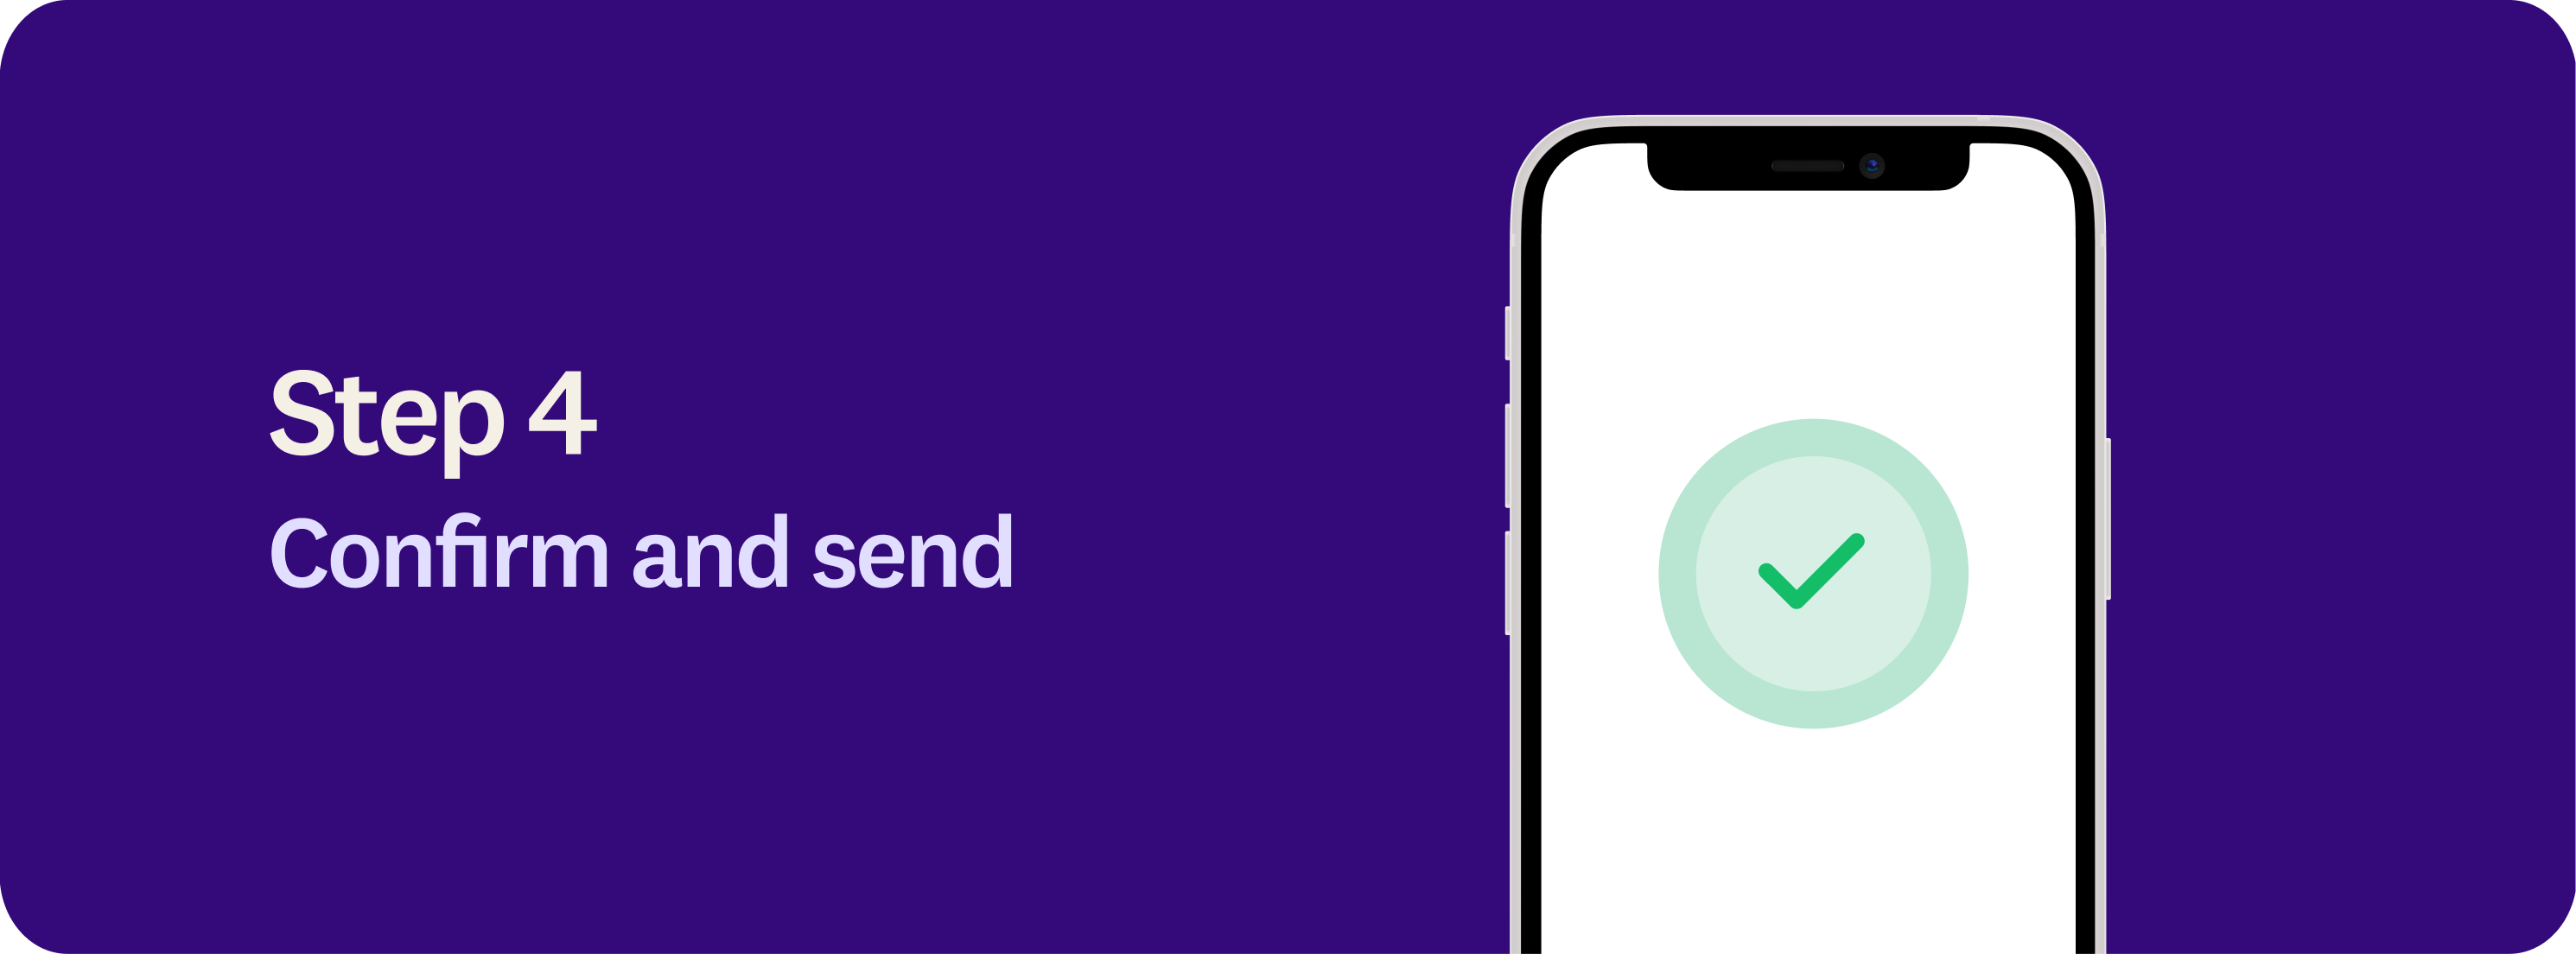
4. Confirm and send
Enter the amount you want to send. Review the wallet address, selected network (if shown), amount, and fees before proceeding. Crypto transactions are irreversible. Once everything is correct, confirm the transfer. Coinbase will then require you to complete security verification steps, such as two-factor authentication or device confirmation, before submitting the transaction to the blockchain.

5. Funds arrival and conversion
Once the transfer is confirmed on the blockchain, your funds will appear in your Raenest account. Transfers typically take 1 to 20 minutes, depending on the network used. Raenest automatically and instantly converts the received stablecoins to USD at a 1:1 rate, so your funds are ready to use immediately.
6. Fees
Currently, the first four stablecoin deposits are fee-free, allowing you to receive funds at no extra cost. Learn more about our fees here.
Whether you’re a freelancer, remote worker, or business owner, integrating stablecoins into your workflow can make a real difference in how you manage and grow your funds. Receive payments in stablecoins with Raenest today. Terms and conditions apply.


.jpg)